Unlock the Secret Strategy Behind My Chicken Meal Prep That Skyrockets Productivity and Saves You Hours Weekly
Ever wondered why some folks swear by prepping the same meal day in, day out? It’s not just about routine or a touch of culinary laziness—it’s about hitting that sweet spot where nutrition meets simplicity. For me, it’s chicken. Yes, the humble, versatile chicken leg, boneless and ready to fuel your day without breaking the bank or your schedule. I get it—meal prep can feel like a chore or a maze of complicated recipes and endless ingredients. But what if I told you that focusing sharp on one protein, done right, could not only keep your protein game strong but make you look forward to lunch every single day? Let’s cut through the noise together and dive into my straightforward system for prepping chicken that’s budget-friendly, tasty, and surprisingly easy to pull off—even if your culinary skills are, well, still a work in progress. Ready to rethink your meal prep game? Let’s roll up our sleeves and get to it. LEARN MORE
img#mv-trellis-img-1::before{padding-top:133.33333333333%; }img#mv-trellis-img-1{display:block;}img#mv-trellis-img-2::before{padding-top:75%; }img#mv-trellis-img-2{display:block;}img#mv-trellis-img-3::before{padding-top:75%; }img#mv-trellis-img-3{display:block;}img#mv-trellis-img-4::before{padding-top:133.33333333333%; }img#mv-trellis-img-4{display:block;}img#mv-trellis-img-5::before{padding-top:177.77777777778%; }img#mv-trellis-img-5{display:block;}img#mv-trellis-img-6::before{padding-top:177.77777777778%; }img#mv-trellis-img-6{display:block;}img#mv-trellis-img-7::before{padding-top:133.33333333333%; }img#mv-trellis-img-7{display:block;}img#mv-trellis-img-8::before{padding-top:70.3125%; }img#mv-trellis-img-8{display:block;}img#mv-trellis-img-9::before{padding-top:75%; }img#mv-trellis-img-9{display:block;}img#mv-trellis-img-10::before{padding-top:60.05859375%; }img#mv-trellis-img-10{display:block;}img#mv-trellis-img-11::before{padding-top:75%; }img#mv-trellis-img-11{display:block;}img#mv-trellis-img-12::before{padding-top:57.6171875%; }img#mv-trellis-img-12{display:block;}img#mv-trellis-img-13::before{padding-top:75%; }img#mv-trellis-img-13{display:block;}img#mv-trellis-img-14::before{padding-top:61.1328125%; }img#mv-trellis-img-14{display:block;}img#mv-trellis-img-15::before{padding-top:90.625%; }img#mv-trellis-img-15{display:block;}img#mv-trellis-img-16::before{padding-top:66.50390625%; }img#mv-trellis-img-16{display:block;}img#mv-trellis-img-17::before{padding-top:24.043715846995%; }img#mv-trellis-img-17{display:block;}
I wrote about my meal prep routine twice and you can find them here:
- Frugal Life: How do I Meal Prep for 7 Days Lunch in Half a Day in Singapore | 2016
- Meal Prep 2.0 – Cooking Your “Go-to” Meal that You Look Forward to Eating Everyday. | 2024
In the last article, I put together a meal prep for vegetables, oats and chicken.
This time I would like to keep it simple by focusing on the chicken. I am writing this somewhat again because some of my co-workers may be considering how to do it and would like to understand the system behind it.
They would realize that I eat the same damn thing daily and that is because… you would need some minimum protein daily and if you can do it in such a way that it taste nice then why won’t you eat it often.
But there are usually a lot of stuff but lets be very focus today – chicken.
1. What to Buy
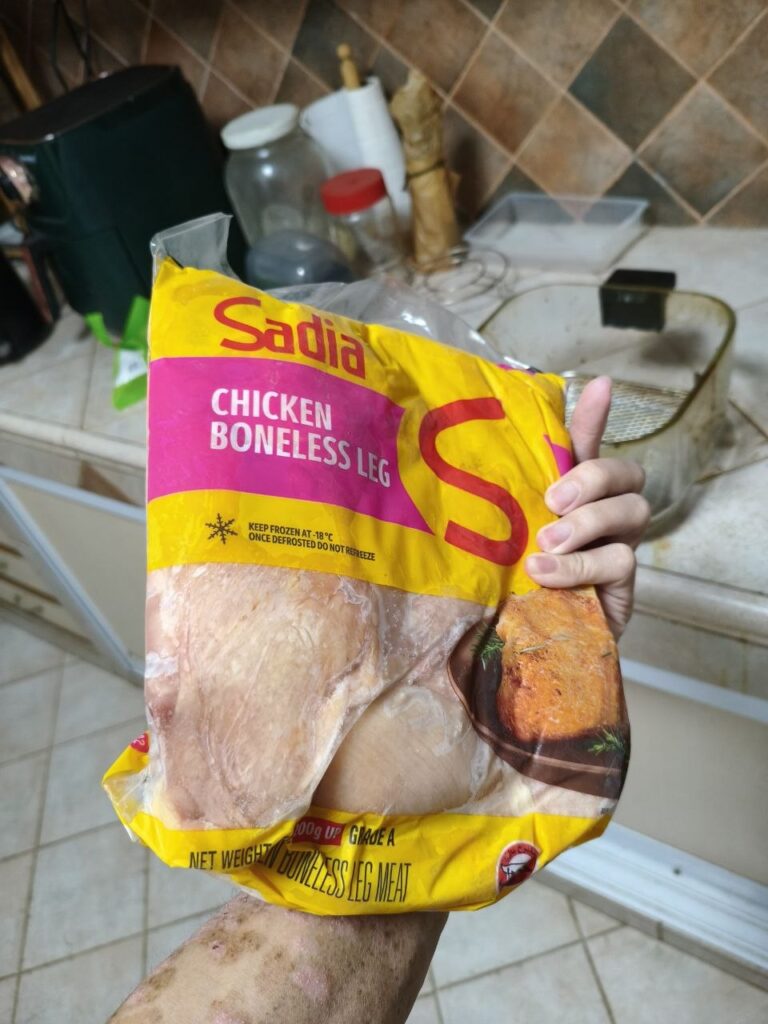
I would usually buy a pack of 2 KG Chicken boneless leg like this:

You can find them here:
- NTUC Sadia Chicken Boneless Thigh – $9.45 (in 2026)
- NTUC Seara Chicken Boneless Thigh – $7.95 (in 2026)
Chicken boneless thigh tend to be more fatty, and in the prep you can remove the skin and trim off the fat. That is what I do.
I would divide them into 4 for 4 meals, which is the only protein for the day. So this works out to be $1.98 to $2.36 per meal.
If you go to Cai Png the staple meat is $1.80 each upwards so that is what you are measuring against.
2. Thaw and then Divide them into 4 Packs
I would usually buy 2 packs of this while coming back from work. On a very frequent basis I would put one back in the chiller (the bottom of the fridge) to thaw the ice.
It would usually take 2-3 days for the ice to thaw.
I would then open the pack up, remove the skin and cut the meat into smaller pieces and divide them into 4 packs like this:

Of course some of you can choose to marinate your chicken now. I don’t because I would usually marinate the night before I cook. I put them in food-safe plastic bag and then put them in the fridge:

So you have a conveyor belt of chicken. I would usually have about 12 meals in there.
3. Always have 2 days Supply in the Chiller
I would bring the pack of chicken down from the freezer to the chiller to let it thaw. Usually they take 1 full day to do that.
You got to consume the thawed chicken in the chiller within 3 days.
4. Marinating the Night Before Cooking.
Since we have some chicken in the chiller, I would usually marinate what I need to cook next morning the night before.
Technically, the longer you marinate, it should be better but try to do it 2 hours before you cook. Actually if you don’t have a choice just do it before you cook is ok. Not the best but what to do.
Now I want to explain some important stuff.
When you buy frozen chicken boneless thigh they tend to be hard. If you cook them like that, you won’t like the texture of the chicken.
The process of making the meat soft is call tenderizing. The tenderizing process breaks down the tough muscle fibers and connective tissues (collagen) in meat, making it softer and easier to chew.
I advice you to do this and there are a few methods. Of course you can use a metal mullet to hit on the meat to break down. There are some agents that will tenderize the chicken. Baking soda is the best but baking soda leaves a smell that you might not want.
I use salt.
If you check out my meal prep 2.0 article, I did put a vast amount of salt during the divide to 4 packets part. I would put the salt for 15 minutes so that it can tenderize the chicken before washing it off.
My current method is to just put enough salt during the marinating part.

Aside from this I also do the lazy method by using some BBQ sauce. They are not the most ideal if you wish to control your sugars and all, but I find that this is the sweet spot. You don’t have to put a bunch of things, and what you put varies from preference. (If you got a simple and good one, do share it with me).
I like the McCormick Grill Mates Brown Sugar sold at NTUC. This one cost $4.80 on discount and they usually will last like a month for me. If you divide among about 25 meals of the month this works out to be $0.192.
So after you are done, put in the fridge.
5. The Next Day… Air Fry
Here is my air fryer:

And I just dump everything here.
I know you guys might find it a chore to clean the air fryer but I usually only clean my air fryer once in a while.
The reason is I use these baking paper meant for air fryer:

Now cooking time.
You can buy them at Shopee.
You want to cook until its cook but not too long.
This is because if you cook too long, the moisture also gets cooked away and your meat will be tough to chew.
If you use too high temperature, the outside might cook but inside is still raw.
Hence this is why I decide to cut them up during Step 2.
They don’t look as presentable but fxxk presentation. You want them to have a higher probability of cooking.
Here is my setting:
- 175 degrees celsius.
- 7 minutes then take out turn them over.
- Another 7 minutes
Then they are done and you can transfer them to a food container if you are bringing to office.
6. Reheating
We would usually put our food in the fridge when we get to the office.
During lunch time we will heat it up.
In our microwave we have this default 800 setting and I would usually do 2.5 minutes.
Epilogue
Well I hope that is clear enough.
I think if you wish to simplify it for a simple Keto or Carnivore meal, you could just add two eggs:

The make up:
- 2 x Premium eggs: About $0.80
- Chicken thigh: $2.50
- Total: $3.30
For the longest time in 2025, I been going with this for lunch. Took a while to perfect that half-gooey egg.
We now have an egg cooking machine in the office. I think this one is not bad. It allows you to cook this gooey one or the Yakun style one. There are less instructions for co-workers. Just put warm water and wait.
My colleague Jiamin found someone code this tool that profile our food by photo and tell us how much protein, carbs and fat:

Not the most accurate but at least you know something.
I find that if you add lettuce bought from NTUC its a simple meal with less fuss:

The make up:
- 2 x Premium eggs: About $0.80
- Chicken thigh: $2.50
- Lettuce: $0.90
- Total: $4.20
I considered this the most stapled meal and it is very satisfying. Some of you may have gone to wedding dinners and they will have those steam chicken and give you lettuce to wrap the chicken with. Lettuce + chicken have a strange effect.
So in this dish you keep getting that feeling again and again and again and again.

You will realize if you add the lettuce, its like it doesn’t move the number much!

The make up:
- 2 x Premium eggs: About $0.80
- Chicken thigh: $2.30
- Dou Miao: $0.50
- Total: $3.60

You could always add avocado to it:

The make up:
- 1 x Avocado: About $1.70
- Chicken thigh: $2.30
- Dou Miao: $0.66
- Total: $4.66

I suspect that they think there is rice but there isn’t.
Fats are damn satiating [make you feel full and satisfied] but the problem is a lot of fats is unhealthy. The first time I added a full avocado to this meal, I feel so full even before I finish half my chicken! And this is consider less than the normal chicken that I took.
Might as well use the tool to measure how different a Kopi-C Siew Dai from Generations Coffee would be:

Generation Coffee Roasters Ice Kopi-c Siew Dai – $3.30
One of the best Ice Kopi-C Siew Dai for me.

1 x Avocado.

Do Like Me on Facebook. I share some tidbits that are not on the blog post there often. You can also choose to subscribe to my content via the email below.
If you’re thinking of opening an Interactive Brokers account, my referral link is here.
As the new account holder, you’ll receive USD 1 in IBKR stock for every USD 100 you deposit, up to USD 1,000 in shares — so a USD 10,000 deposit gets you USD 100 in IBKR stock, and the bonus is capped at USD 1,000 for deposits of USD 100,000 or more. A few other things to know: the minimum deposit to qualify is USD 10,000, done within 30 days of opening, and the bonus shares are locked up for one year from the award date. The promotion is currently active, and using the link costs you nothing extra. On a separate note, if you haven’t already, it’s worth taking a look at how IBKR’s share price has performed over the past five years — the stock you receive as a bonus isn’t just a token; it’s a stake in a company that has done quite well for its shareholders.
I break down my resources according to these topics:
- All my personal notes about how my philosophy behind my own money and how I manage it.
- Building Your Wealth Foundation – If you know and apply these simple financial concepts, your long term wealth should be pretty well managed. Find out what they are
- Active Investing – For active stock investors. My deeper thoughts from my stock investing experience
- Learning about REITs – My Free “Course” on REIT Investing for Beginners and Seasoned Investors
- Dividend Stock Tracker – Track all the common 4-10% yielding dividend stocks in SG
- Free Stock Portfolio Tracking Google Sheets that many love
- Retirement Planning, Financial Independence and Spending down money – My deep dive into how much you need to achieve these, and the different ways you can be financially free
- Providend – Where I work and do research. Fee-Only Advisory. No Commissions. Financial Independence Advisers and Retirement Specialists. No charge for the first meeting to understand how it works
Kyith is the Owner and Sole Writer behind Investment Moats. Readers tune in to Investment Moats to learn and build stronger, firmer wealth foundations, how to have a Passive investment strategy, know more about investing in REITs and the nuts and bolts of Active Investing.
Readers also follow Kyith to learn how to plan well for Financial Security and Financial Independence.
Kyith worked as an IT operations engineer from 2004 to 2019. Currently, he works as a Senior Solutions Specialist in Fee-only Wealth Advisory Firm Providend. All opinions on Investment Moats are his own and does not represent the views of Providend.
You can view Kyith’s current portfolio here, which uses his Free Google Stock Portfolio Tracker.
His investment broker of choice is Interactive Brokers, which allows him to invest in securities from different exchanges all over the world, at very low commission rates, without custodian fees, near spot currency rates.
You can read more about Kyith here.
TESSAN Surge Protector Power Strip, 5 Ft Flat Plug Extension Cord with 3 USB (1 USB C) 8 Outlets, 1250W, 900J Protection, 3 Sided Outlet Extender with Power Switch for Office, Dorm Room, Grey
(as of July 9, 2026 02:53 GMT +00:00 - More infoProduct prices and availability are accurate as of the date/time indicated and are subject to change. Any price and availability information displayed on [relevant Amazon Site(s), as applicable] at the time of purchase will apply to the purchase of this product.)
DaVinci Gourmet Classic Blue Raspberry, 25.4 Fluid Ounces (Pack of 1)
$7.99 (as of July 9, 2026 02:45 GMT +00:00 - More infoProduct prices and availability are accurate as of the date/time indicated and are subject to change. Any price and availability information displayed on [relevant Amazon Site(s), as applicable] at the time of purchase will apply to the purchase of this product.)
Medium Hass Avocado
(as of July 9, 2026 02:45 GMT +00:00 - More infoProduct prices and availability are accurate as of the date/time indicated and are subject to change. Any price and availability information displayed on [relevant Amazon Site(s), as applicable] at the time of purchase will apply to the purchase of this product.)
BARK&SPARK Advanced Calming Chews for Dogs - Separation Anxiety Relief for Dogs w/Hemp Oil + Melatonin - Relief During Fireworks, Storms - Aggressive Behavior, Barking, Stress Aid - 90Chews
$15.97 (as of July 9, 2026 02:48 GMT +00:00 - More infoProduct prices and availability are accurate as of the date/time indicated and are subject to change. Any price and availability information displayed on [relevant Amazon Site(s), as applicable] at the time of purchase will apply to the purchase of this product.)


Post Comment